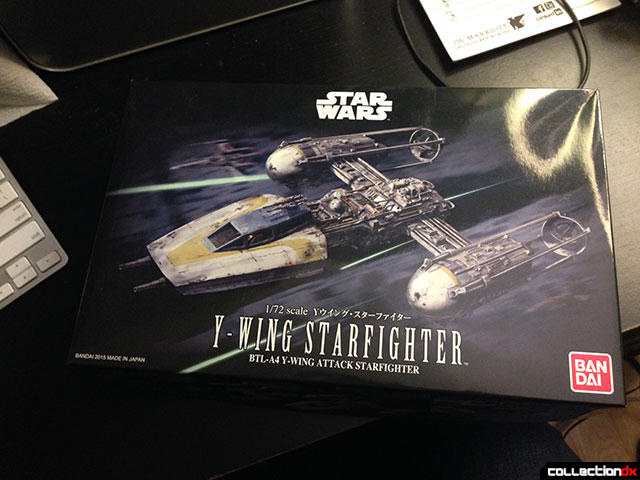
Y-wing starfighter

Review by JoshB
Like any good nerd, I've been a fan of the vehicles of the Star Wars trilogy since I first saw them on screen in 1978. I had the Y-Wing toy as a kid, I bought it again as an adult, and I even bought the Clone Wars version. To me, that clone wars toy had a sense of history that showed that the Y-Wings we knew were once fully armored, brand new Starfighters.
Now I don't build a lot of kits, but after building the R2 set I was ready to tackle one of the ships. the Y-Wing was my first choice.
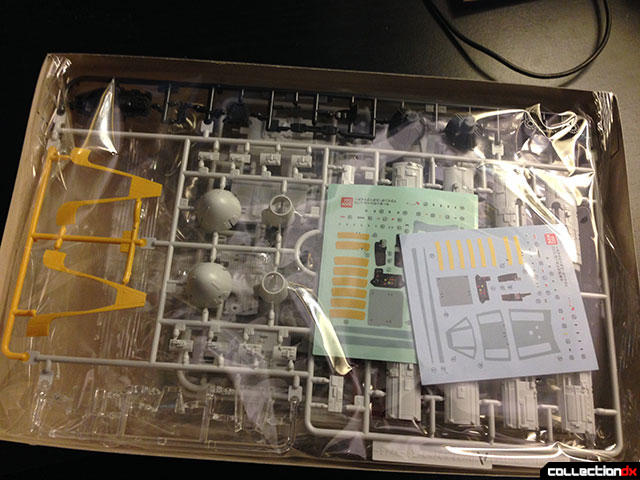
The kit is 1/72 scale and comes unassembled on 10 sprues.
Each sprue comes bagged, and upon opening I can see that some parts are molded in color.
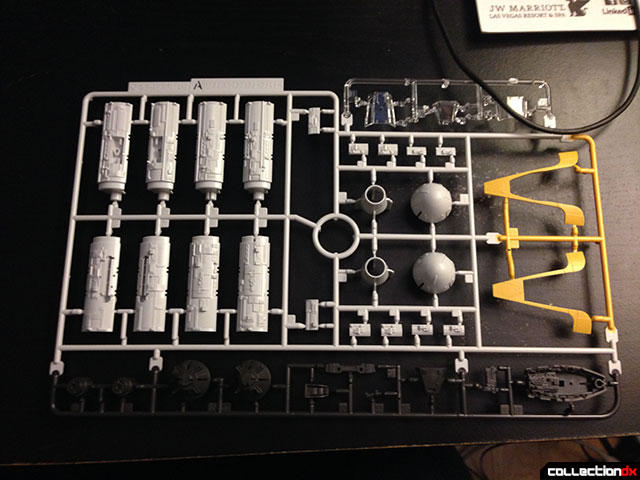

So far everything looks good. However I'm beginning to realize that in order to bring this thing to life I'm going to have to paint this thing. I never paint my Gundam kits, but For this to come to life it's going to need some weathering.


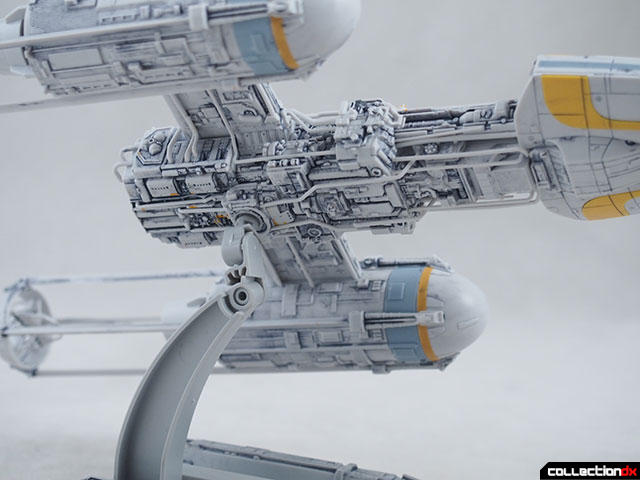
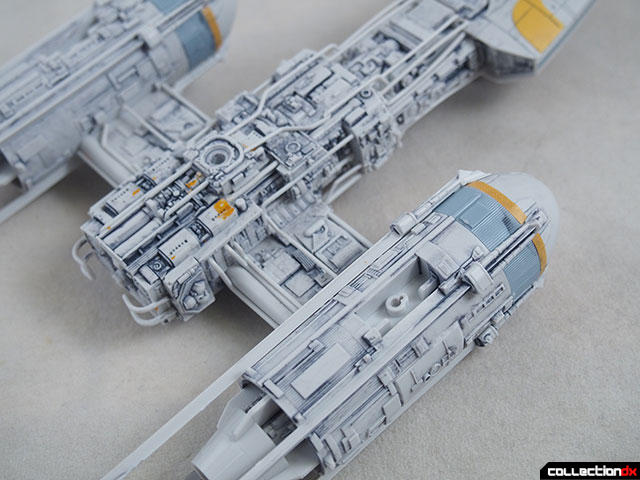
My confidence was high until I saw this sprue. This sprue features all the microscopic piping that covers the exposed parts of the ship. As you know, the Y-Wing was once armored until they decided to strip away the armor. This was going to be difficult.
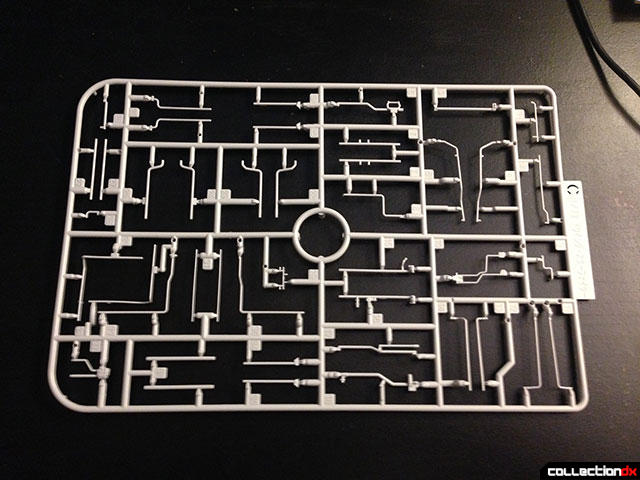
Assembly starts with the main body, so I did a wash with acrylic paint on each part before assembly. I think it came out ok without having to spend a ton of time on any one part. With the main wash done I had to start applying that small tubing, and I can't tell you what a pain the ass that was. I did snap a few pipes when I was removing them from the sprue, and I needed to use tweezers to get them in place. Still, despite the size, I didn't need to use any glue.

The original screen-used prop ships were basically kit-bashed from old military models, and as I was building this I really had a new appreciation for the work that went into those models. Each part was selected and placed to add a layer of detail, but still be unrecognizable as a part from another kit. It's really remarkable, and I think this kit does a great job in preserving that level of detail. It would have been easy to mold those pipes and small parts in, but Bandai went with an authentic approach that worked great.

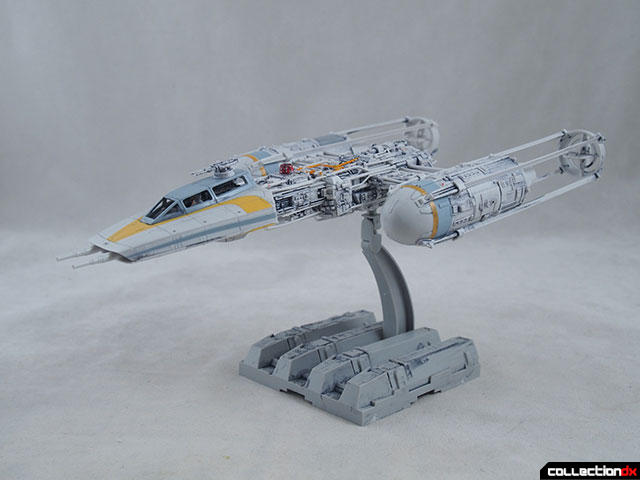
The finished model came out great, at least by my standards. I am always afraid of paint but in this case I think it worked out well.

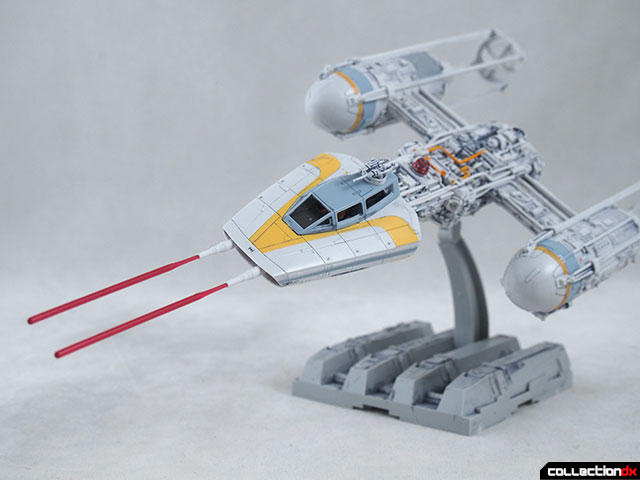
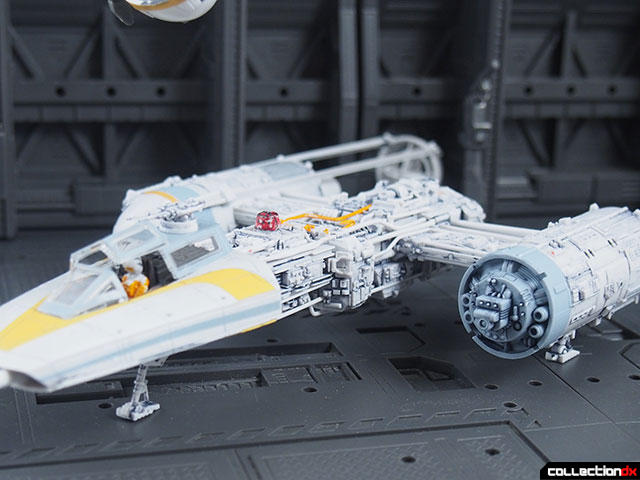
The finished kit comes in at about 9 or so inches long, and can be displayed in a variety of ways. The Death Star baseplate comes with an arm that has a six way joint that can connect to the bottom of the ship. In addition, there are connector parts to connect to other bases, as well as a small cover to fill the hole left by the stand.

The long connectors to the engines were a bit of a pain, as the end parts don't give a lot of plastic to hook on to. They were straight though, and that was all that mattered.

Note the two "U" shaped parts on the back of the center of the ship. Both of those broke off when removing the body from the sprue and had to be glued back into place.

Tilting up the stand allows you to get a good luck at the underside of the ship, and a close look at all the damn piping that needed to be added. It was a chore but I think it was worth doing.

Can you find the pipes that broke in this mess?

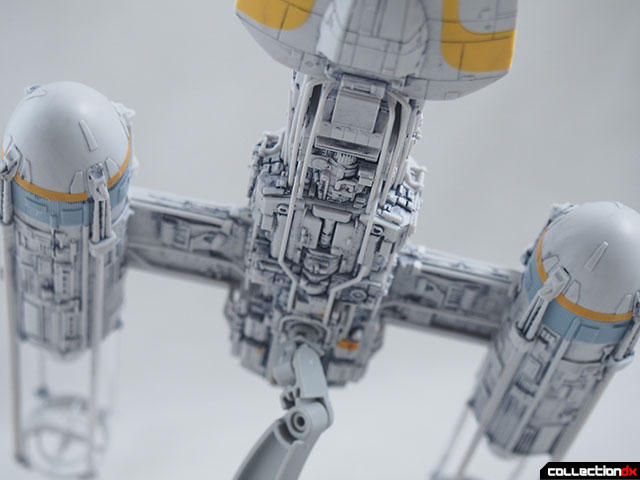
I painted a few pipes orange, based sort of on the box art. It came out OK I guess, but lets not look too close at that R5 unit I tried to paint.

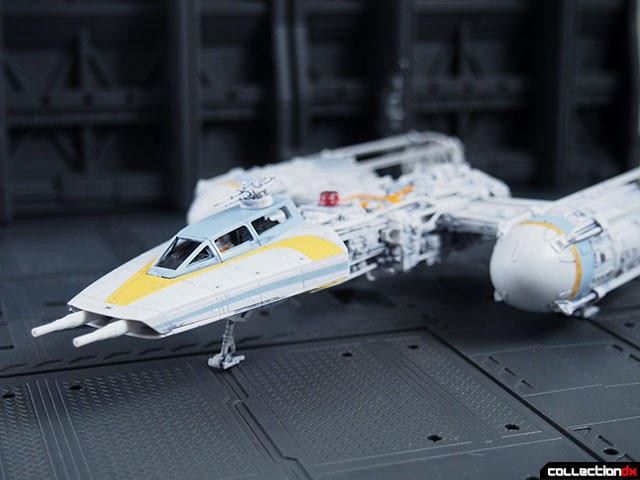
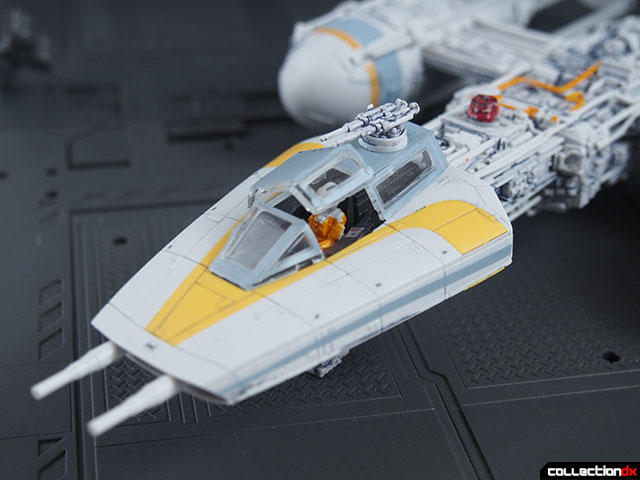
The cockpit unit has a moveable turret, and the yellow bit is molded in color. Some stickers also helped bring out the detail. Both water slide and self-adhesive versions of the stickers are included.
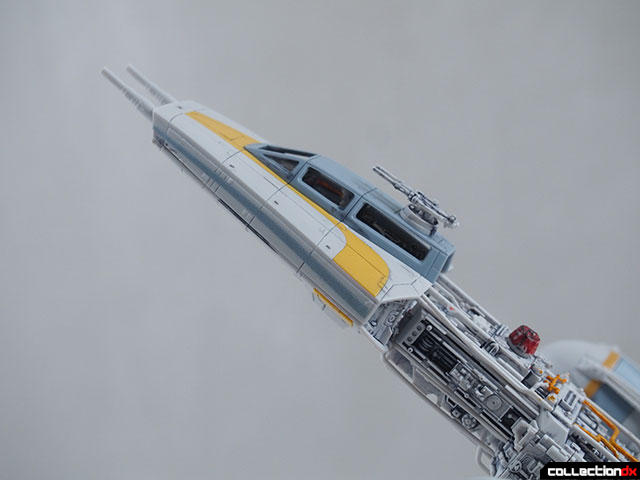
Two clear red laser blasts can be added for some weapon effects when in battle. The connecting pegs are VERY small, so be careful.
A set of landing gear is included, but you have to manually remove panels to access the connection ports. One complaint about the design of the ship itself, (and not the kit), is that there is no visible panel or door opening for the landing gear. It's just there or it isn't.

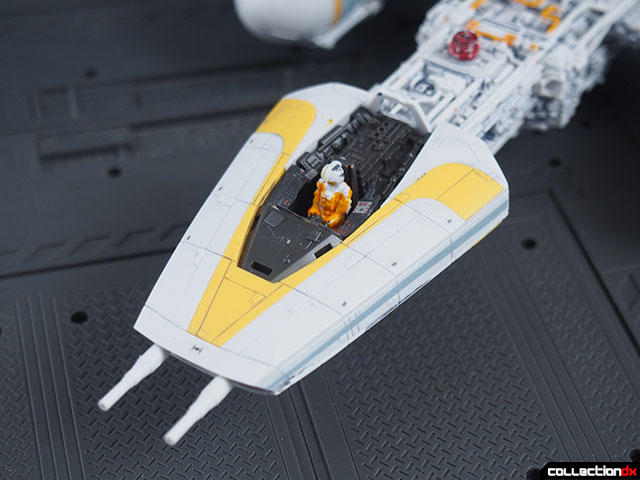
The canopy is removable to get a look inside the cockpit. I tried to give the pilot a little color but I am not that good at painting such small things. The instrument panels in the cockpit are decals, and while it's a nice idea, since the panels are textured, the stickers don't want to stick.

A second canopy set is included and molded in clear plastic. This clear set is three parts, with the middle section propped open. Grey decals are included to color the border but it really doesn't look great. It's worth noting that the non-opening canopy does not have any windows at all.

Another nice touch is the front of the engines feature a removable cover.


Finally, additional pilots are included. You get a standing pilot, a ROTJ style pilot, and an R2 Unit. You can build the kit with either pilot or either Astromech droid, but once the droid is in place it does not appear to be removable.

At about 35 bucks this is a great kit and a great value. However, keep in mind that due to licensing issues, these kits are not available from domestic retailers and must be imported.
Comments
2 comments postedThe work you did looks really nice!
Acrylic Wash was a great idea and a good alternative to getting that Tamiya Line Accent I suggested. It looks better actually, makes it more rugged and lived in.
Have to agree. The wash came out great. Made the right details pop.