Wings72 IJN A-Target Ko-Hyoteki Midget Submarine “Pearl Harbor”

Review by Showapop
Earlier this year I reviewed Fine Molds excellent 1/72 injection molded plastic model kit of the Imperial Japanese Navy A-Target Midget Submarine. On the 69th anniversary of the Attack on Pearl Harbor, December 7th, 1944, I will review the other 1/72 scale A-Target Midget Submarine model kit by USA manufacture Wings 72.

The Wings 72 model kit is actually the first kit out on the subject debuting at the 45th reunion of Pearl Harbor Survivors Association, Honolulu Hawaii, December 7th 1986. With the modern Fine Molds kit out on the market and the Wings72 vacuform kit currently available for around roughly the same price, should you pick up both versions? For the history of this particular submarine and pilot please read my previous review of the Fine Molds A-Target model kit review.

The major difference between both of these kits is the Wings72 is a vacuform kit and the Fine Molds' kit is a injection molded kit. What is a vacuform kit you may ask? Simply, a wood or metal mold of a subject is made and sheet plastic is placed in a holder over the mold. The sheet plastic is heated and settles over or inside the mold producing a molded sheet plastic of the kit. Action figure clear plastic blisters are made this same way but instead of a protective covering for an action figure package one will get a model kit instead. Vacuform kits was an inexpensive way to produce model kits of subjects without a huge demand without having to invest in injection molds that could cost thousands of dollars to produce.


Vacuform has its pros and cons. While not particular popular method of making sci-fi and anime kits, which usually prefer resin as a method to manufacture kits, vacuform was popular for airplane model kits for many years until the advent of inexpensive injection mold making in China and Eastern Europe. Few vacuform companies exist today as a result. Vacuform kits are difficult for most modelers, as they require a degree of skill to build and finish. Advanced scratch building skills are required, sanding the mating edges of the kit is tedious and time consuming and many rare primary references sources are needed to guide you through the building of the kit.

Wings72 1/72 IJN A-Target Midget Submarine “Pearl Harbor” is bagged with a header and includes: 1x Plastic Sheet of kit, 1x bag of lead parts, 1x resin part, 1x decals, 1x Instruction sheet, 1x history sheet. I bought this kit at local model kit swap meet used for $4.00 but you can still pick it up from the Wings72 website for around $20.00. Out of the bag, this kit builds the A-Target Submarine H-15 that was scuttled at Pearl Harbor on December 7th 1941. The kit details includes the “December 8th” damaged smashed net cutter nose version as it appeared after the wreck on the beach and its subsequent war bonds tour.
I originally started building this kit before I received the Fine Molds kit from Hobby Link Japan but stopped after I ran into some minor detail issues with the Wings72 kit. One issue I have with vacuform kits is the lack of minor detail illustrations in the instruction sheet. Most details are explained in paragraphs and to me a picture is worth a thousand words, especially with building model kits.
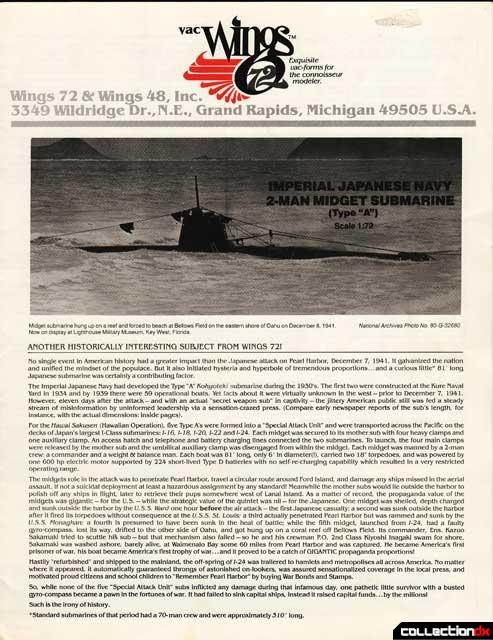
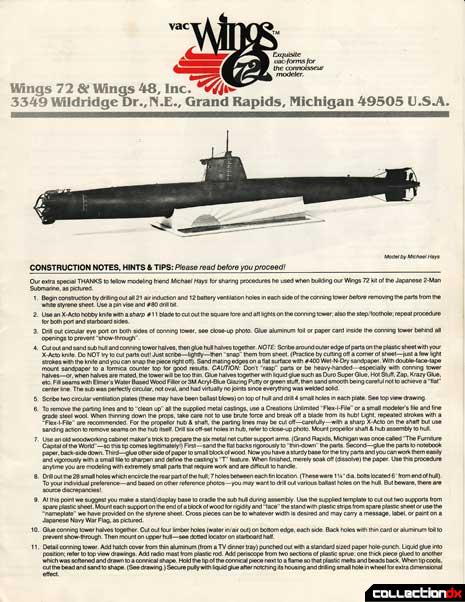
The Wings72 kit includes two instruction sheets. One is the history of the A-Target submarine using original 1940’s photographs and news paper clippings while the second sheet has a 72nd scale drawing of the kit, instructions and pictures of the actual submarine when it was on display at the Lighthouse Military Museum Key West Florida before it was moved to the Pacific War Museum in Texas.
The kit comes with resin and lead parts for small details of the submarine including the nose net cutter, torpedo covers and propeller screw. I was not to particularly impressed with the quality of the single resin part and some of the lead parts. Since I already had built a “Pearl Harbor” A-Target I decided to leave most of the resin and lead parts off the kit, opting to use only the torpedo covers and propeller screw as the net cutter was particular only for the Pearl Harbor submarines. Since the Fine Molds A-Target’s decals sheet had markings for three submarines, I decided to use the extra decals of the Fine Molds’ “Ourasaki, Hiroshima August 1944” based submarine for my Wings72 kit.

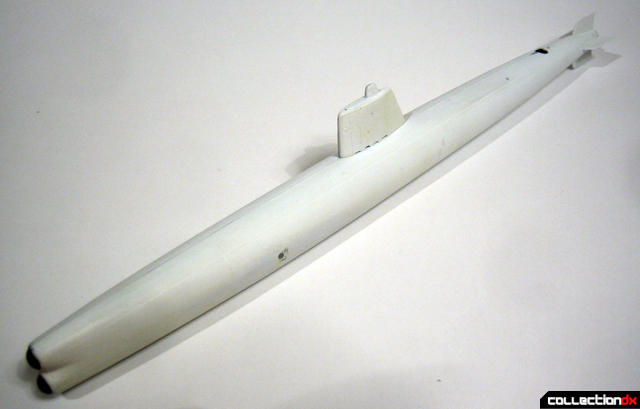
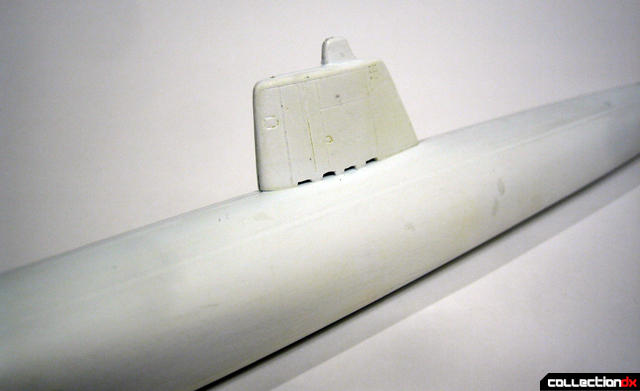
Cutting out the parts and sanding the edges are the single most important part of building a vacuform kit. I carefully cut out the hull and the conning tower with a razor and sanded out the edges of the parts using sandpaper taped on a flat surface. Give yourself about a week to sand and shape the parts. If one over sands the parts you can end up with an oblong body. The major differences between the Fine Molds and Wings72 kit is the Wings72 kit is a little bit longer, the conning tower for the wings 72 is narrower and there is a better nuanced nose with the Fine Molds kit. Comparing features like surface details would be unfair as both injection kits and vacuform kits have manufacture techniques where surface details will look different from each other but the Wings72 kit has soft recessed panel lines throughout the conning tower and hull surfaces. Building the kit is straightforward. Glue the hull and conning tower halves together and then glue both of those parts together. Make sure you glue the lead torpedo covers in first before you glue the hull halves together. The only real scratch building that one needs to do is the hull fins and air vent. I photocopied the 1/72 drawings of the fins from the instruction booklet. I then cut out and glued the paper fins onto some sheet styrene. I cut the sheet styrene to shape and shaped, detailed and carefully glued the fins on the hull. This was a very time consuming process, as all four fins have to match and line up properly.

The rear air vent was made with a old Tri-master photoetch screen. This is an option of the modeler as the vent had a cover as well and modeling both versions would be correct. If one decides to produce the uncovered vent this step needs to be finished before the hull halves are assembled.

Finally, the small details were added on the submarine hull, which include the hatch, periscope, propeller screws and other minor details. These parts came from my parts box. The kit was then ready for paint.
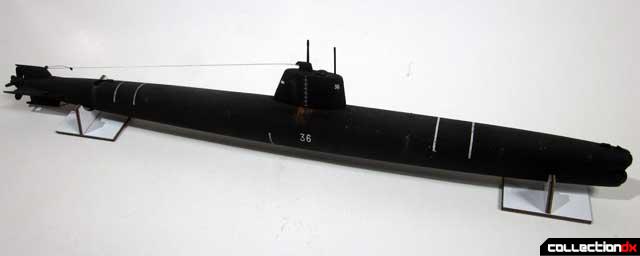
I mixed and airbrushed the kit with dark grey color using a mixture of Tamiya Black and Tamiya German Grey. A-Targets were painted black but that is not a good color for model kits as it hides all the details and makes the kit look dull. Mixing black with German grey makes the color of the kit look better. I had problems with paint bonding to the plastic so I suggest using a primer so the paint can have some tooth to bond to the plastic.

I spayed Testors clear gloss so the decals have a smooth surface to bond to. The decals were mostly provided from the Fine Molds decal sheet. The only decals I used from Wings72 sheet were the front weight lines. The decals were extremely thick and no amount of gloss coat could have hidden the height of the decal.


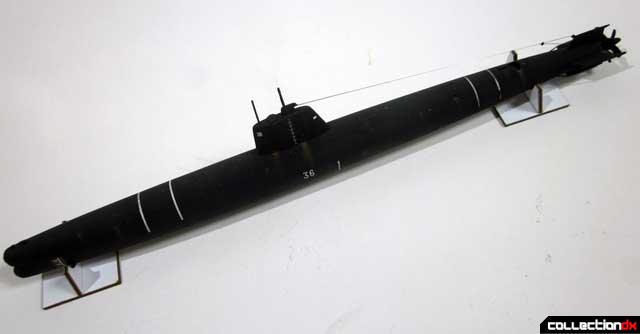
After a few coats Testors clear flat, I weathered up the kit using my usual mixture of oil paints and finally used a silver pencil for dents and scrapes. Brown artist chalk was used for the rust and finally the conning tower wire was attached with clear stretch sprue.
Keep in mind that my version of the Wings72 kit is an older produced vintage kit and I am not sure if Wings72 has updated the lead, decal and resin pieces. If they have not, the decal sheet defiantly needs to be updated and the resin and lead parts could be molded sharper with recent and better resin casting technology. As vacuform kits go, this is a relatively easy kit to build because the kit is essentially four parts and four scratch built fins.
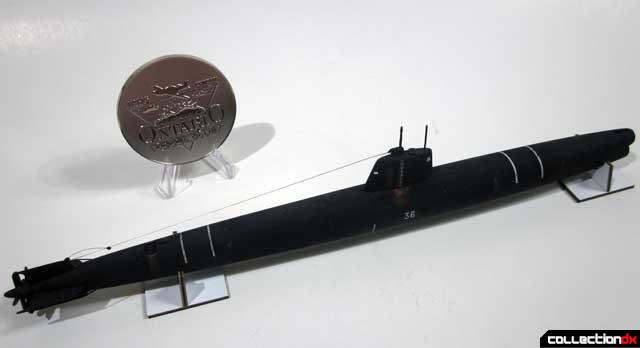
Building vacuform kits is quite a challenging experience and having build more than a few over the last 20 years I can say that this is the best results I have ever had from building one. I entered Wings72 A-Target into the “Scratch Built and Vacuform” category at the Ontario IPMS Minicon 2010 and was awarded second place in the very difficult to win contest category, which shows what one can pull out of a 24 year old vacuform kit.
Is it worth picking up? I believe both Fine Molds and Wings 72 kits need to purchased and built especially if you are a fan of the subject or into 1/72 scale navy kits. Both kits compliment each other: You can use the Fine Molds decals and kit details for reference to help build the Wings72 kit and Wings72's well detailed photographs of the actual submarine in the instruction sheet can used to detail the Fine Molds kit. If you never had tried a vacuform kit before this is a great place to start to produce a bold display piece representing that tragic day on December 7th 1941.
©2010 Article and Pictures by Leonardo Flores and CollectionDX