T-47 Snowspeeder

Review by Showapop
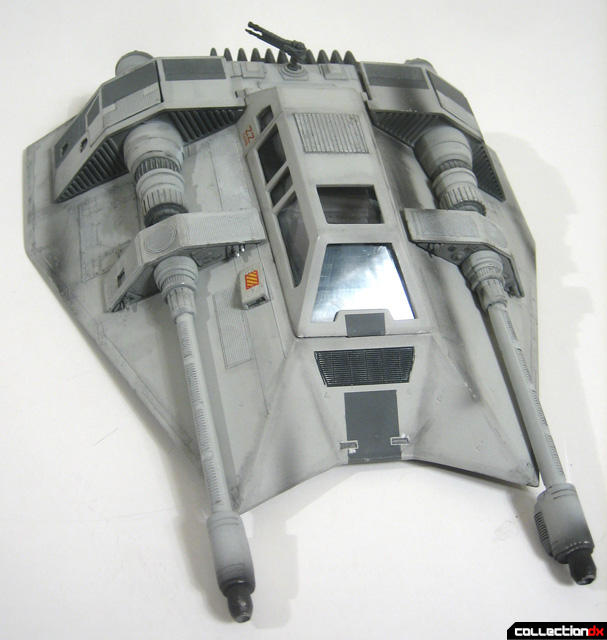
Empire Strikes Back T-47 Snowspeeder
Episode 5: The Empire Strikes Back will always be my favorite Star Wars film and I will never forget watching it on the big silver screen when it was first released back in 1980. One of the best aspects of the film besides the wonderful direction by Irvin Kershner, the expanded characterizations of the Star Wars ensemble, beautiful lighting and one of the best endings ever, were the vehicle designs.

It is hard to imagine the Star Wars universe without the AT-AT, AT-ST, Slave 1, the Tie Bomber and my personal favorite Luke Skywalkers’ T-47 Snowspeeder as used in the Battle of Hoth sequence in the first act of the film. With the impending release of Fine Mold’s Snowspeeder in 1/48 scale I thought I would revisit MPC classic Star Wars Model kit of the T-47 Snowspeeder.
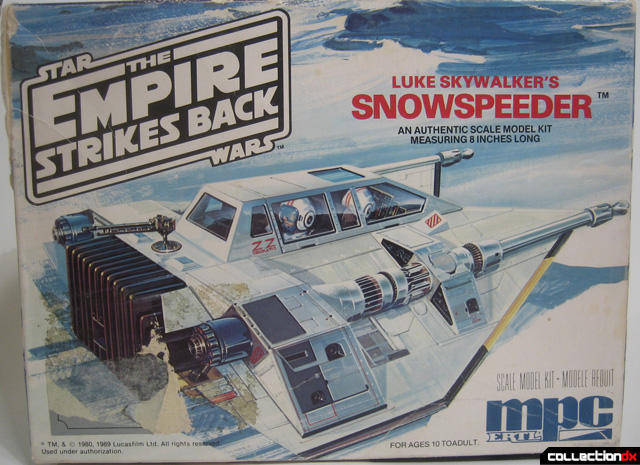
MPC’s Snowspeeder kit has been around for nearly 30 years and it still holds up quite well. The scale of the kit has been debated over the years and it seems that most modelers have settled on the box scale of 1/22 scale, just a bit larger than the automotive scale of 1/24 scale. I purchased this kit at the gift shop at the end of the Star Tours ride at Disneyland back in the early 1990s for around $10.00 but you can still easily pick one up today on eBay between $10.00 and $20.00.
The boxed Snowspeeder includes: 4x sprue, 1x clear sprue, 1x water slide decals, 1x instruction sheet, 1x “Blueprints” ATM/MPC club sheet.
Options include raised or closed speed brakes. Keep in mind MPC/ERTL plastic is softer than most types of plastic used by other manufacturers so you should be careful in fitting and sanding seams as you can easily chew through the plastic with little effort.
I had sat on this kit for many years as it was filed away in my “Sci-Fi: Other” bin and I would simply forget that I owned it. I had worked on it off and on over the years but in the last few months, I had made it a priority to finish the kit for CollectionDX so I can be ready to build the Fine Mold’s kit when it is released later next year.
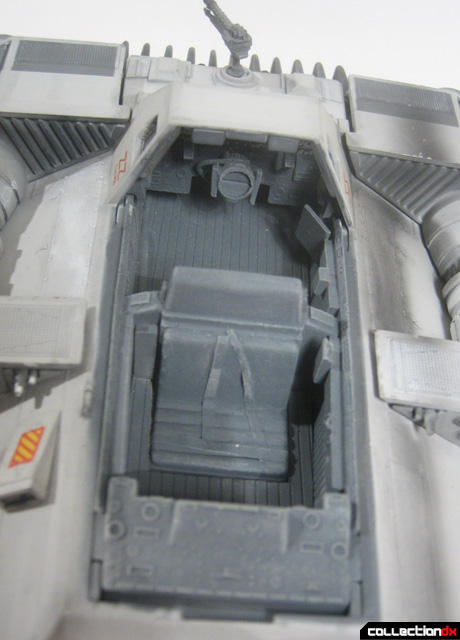
The molding features raised panel lines and details, some experienced modelers usually rescribe the panel lines but I opted to leave them as is, as the raised panels wash quite well when the kit is weathered. The fine details in the cockpit and braking flaps also dry-brush quite nicely when they are weathered. I added details in the cockpit area including a new ribbed floor with sheet plastic stock and handles and other small details for the rear gunner area. I especially love the armor plating details above the gunner’s seat.
The pilot figures that are included with the kit are just plain awful, the arms of the pilots nearly being as long as the body of the figure like some weird ape. These figures are best left off the kit as the pilot figures of these old Star Wars MPC kits are some of the worst ever to be included in a model box.
What makes this kit great for beginners is that there are only three seams to fill: The seam that connects the bottom of the hull to the top and the seams on the laser cannon halves. Most of the assembly is component, which means if you do not have an airbrush you can spray paint these parts separately and assemble them after the parts are dry. Also, it is suggested to cut the cannon holders on the front of the hull off with an x-acto saw as they are not on any of the filming models and are not seen in the film.
The kit comes with an option to build the T-47 with open or closed speed flap brakes. I chose to model my Snowspeeder with moveable brakes that can be positioned open or closed. Take care in fitting the parts to the body of the T-47 as they should be nice and trimmed to avoid any fitting problems in final assembly.
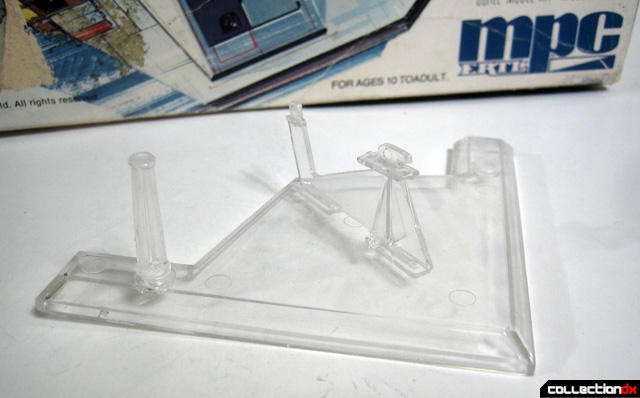
One of the worst features of the kit is that it does not come with any landing gear and the clear display stand that it does come with is very flimsy and does not hold the weight of the Snowspeeder well. I plan to purchase a new stand at a later date to properly display the model but scratch building a new set of landing gear should not be that much of a chore and I highly suggest it to anybody who is going to build this model kit.

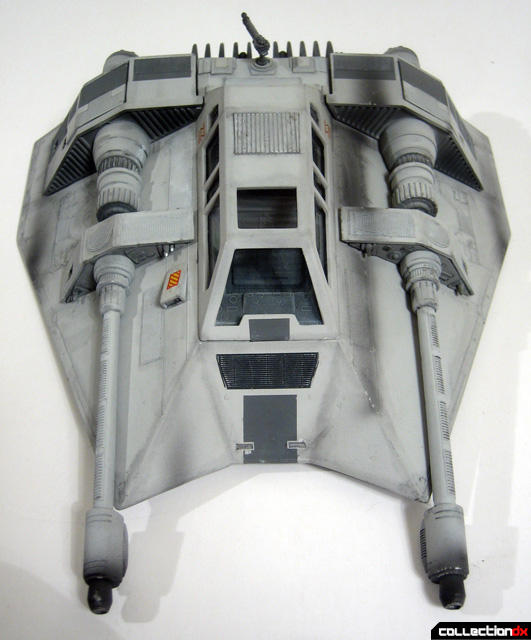
The Snowspeeder was painted dark grey in the interior and a 70-30% mixture of Tamiya’s flat white and light grey. Even with that mixture, I believe it came out a little dark. Tamiya paints are a bit opaque and I had originally painted the kit with another Tamiya grey that dried too dark. I believe that undercoat is still peaking through the lighter topcoat.
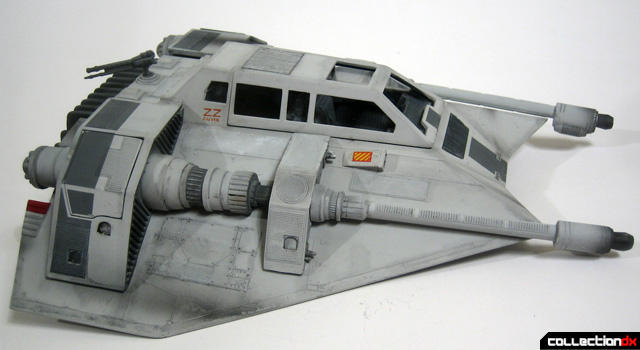
I modeled and painted my kit after Luke’s Snowspeeder in Empire Strikes Back. Please take an afternoon out to paint all the stencils as it is a time-consuming process but when done properly it will look beautiful. Most of my references were found on Starshipmodeler.com and various Internet photos of the Lucas Films Masterworks limited edition model of the Snowspeeder that was released a few years back. The decals went on great although I would sand down the details on the vent on the side of the cockpit, as it is difficult for the decals to set on the heavy detail contours of the vent and they are not on the original film model.
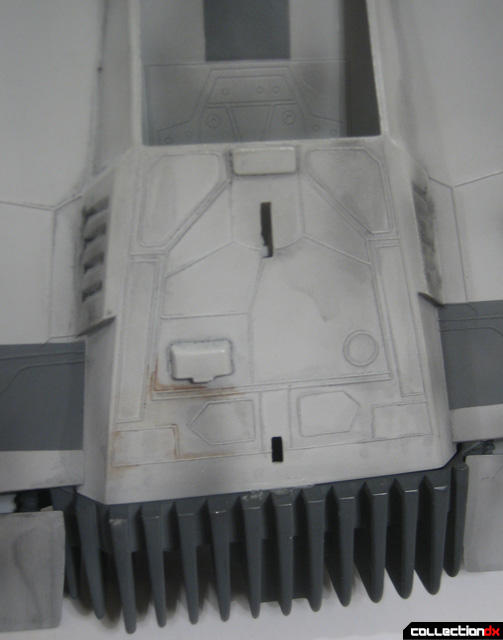
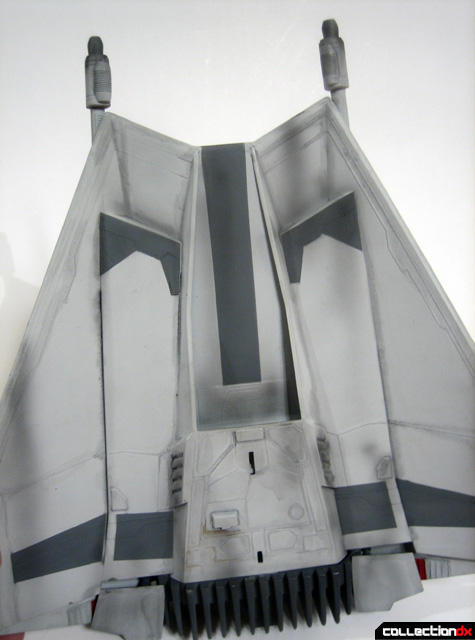
The only shape issues I noticed was the rear box braking area of the kit. They should be of equal sizes but as produced the panel with the steps on it is longer than the rest. While this is not an issue most viewers of the kit would notice, it becomes an issue when you are painting the square stencils on the parts. I was able to paint the stencils on equal size but because of where they are positioned they are not film/production model correct.
I had a great time weathering my Snowspeeder. I used Wilson black oil paint wash, but I suggest a grey oil wash if possible as it would not look as dark and blend better with the color of the Snowspeeder. I used an airbrush to spay exhaust and other minor damage around the edges of the fuselage and applied silver paint throughout the kit for wear. The raised and recessed details give the modeler a lot to work with and weathering the kit was one of the most enjoyable steps in building the kit.
What is nice about many of these older sci-fi kits is that the Model producers were not ashamed to manufacture large model kits. The T-47 is a nice large size and is a standout kit in the display case. Most model companies these days like to manufacture small kits that fit in the palm of one's hand so it is great to build a large sized kit of a design that I have always appreciated.
This is a fun kit to build and I highly suggest it for beginners and experienced modelers alike. Beginners will not have any problems assembling and painting the kit and experienced modelers will want to super detail the interior and flap area of the kit and scratch build a set of landing gear.
©2008 article and photos by Leonardo Flores & CollectionDX